How to Quiet a Cold Plunge Chiller: Proven Noise-Reduction Tips & DIY Solutions
Introduction
Cold plunge therapy offers powerful recovery benefits, yet the humming of a chiller can distract from the intended calm. In this guide, one will learn how to identify the primary sources of noise, apply practical sound‑dampening techniques, and implement DIY modifications that preserve performance while creating a quieter environment. The information is valuable for home‑gym owners, athletes, and wellness enthusiasts who desire a serene recovery space without sacrificing the efficiency of their cooling system.
By the end of the article, the reader will be equipped with a step‑by‑step plan, a list of optional accessories, and troubleshooting advice to maintain a low‑noise operation for years to come.
What You'll Need
- Rubber vibration isolation pads or anti‑vibration mats
- Acoustic foam panels or weather‑stripping tape
- Adjustable wrenches and basic plumbing tools
- Silicone sealant (optional for pipe joints)
- One of the recommended chillers for reference and spare parts
All recommended chillers are available on Amazon and include the necessary accessories to complete most steps without additional purchases.
Step 1: Identify the Primary Noise Sources
The first major step is to determine whether the sound originates from the compressor, the circulation pump, or water‑flow turbulence. Turn the unit on and listen from three positions: directly on the chassis, at the pump inlet, and near the hose connections. Note the decibel level if a sound meter is available; typical quiet units operate below 45 dB.
If the compressor dominates, the issue is often vibration transmitted through the metal frame. If the pump is louder, water‑flow resistance or cavitation may be the cause. Understanding the source guides the selection of the appropriate product.
For users who already own a AS ColdPlunge Chiller, the built‑in pump and washable metal filter provide a baseline for comparison. This model is rated 4.3/5 from 173 reviews and costs $399.00. Its quiet‑operation claim makes it a useful benchmark when evaluating other units.
Step 2: Isolate Vibration from the Compressor
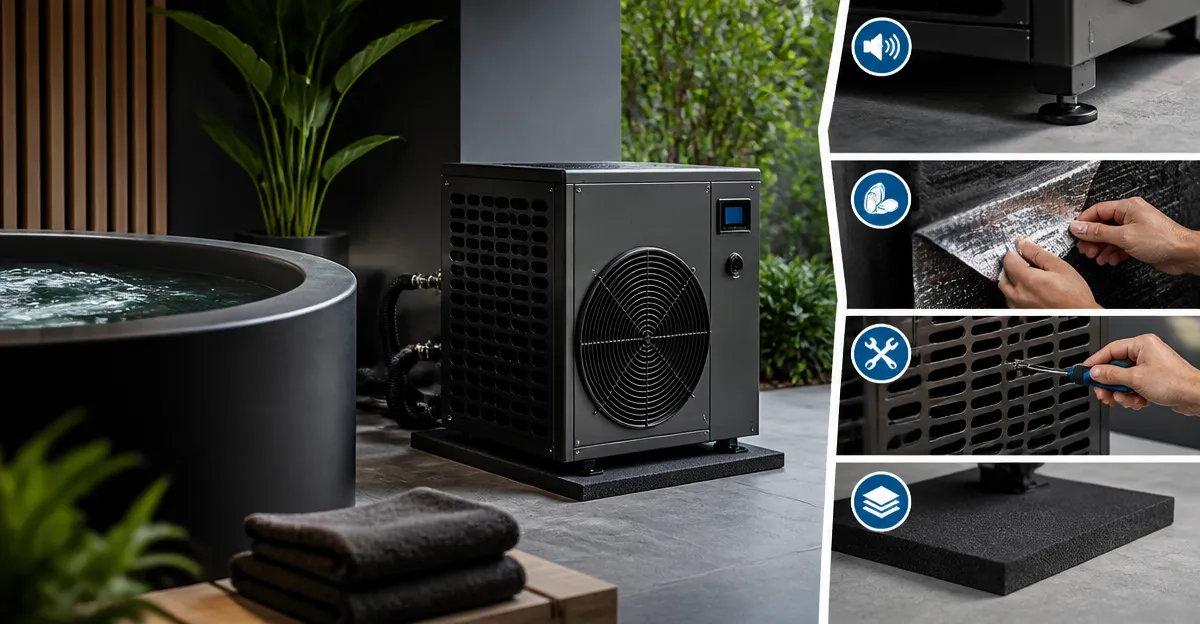
Once the compressor is identified as the main culprit, place rubber isolation pads beneath each foot of the chiller. The pads should be at least 1‑inch thick and rated for up to 200 lb to absorb low‑frequency vibrations. Secure the pads with non‑slip adhesive if the unit sits on a smooth floor.
For added isolation, consider a small platform built from MDF board topped with a layer of acoustic foam. This creates a mass‑loaded barrier that further reduces transmission to surrounding walls.
The FADHOLE Ice Bath Chiller includes a robust 1/3 HP compressor and is praised for its quiet operation (4.7/5 rating, $329.99). Users report that the built‑in pump’s low vibration design lessens the need for extensive padding, making it a convenient alternative for those seeking a quieter out‑of‑the‑box solution.
Step 3: Reduce Pump‑Induced Noise and Cavitation
Water‑flow noise often results from high pressure or air bubbles entering the pump. Begin by ensuring that the submersible pump is fully submerged and that the inlet hose is free of kinks. Use the supplied quick‑connect fittings to create a smooth, 90‑degree turn rather than sharp bends.
If the chiller’s pump remains noisy, replace the standard hose with the insulated hoses provided in the kit. These hoses not only retain temperature but also dampen vibration along the water line. The Fox Plunge Chiller ships with insulated hoses and an external filter that reduces debris, which in turn minimizes pump strain. It is rated 5/5 from five reviews and priced at $299.95.
When using the Fox Plunge unit, install the external 20‑micron filter cartridge as instructed. Clean the filter weekly to prevent clogging, which can cause the pump to work harder and generate more noise.
Step 4: Insulate Pipes and Hoses for Acoustic Dampening
Even after vibration isolation, sound can travel through the metal hoses and pipework. Wrap each hose with a layer of acoustic foam or neoprene pipe insulation. Secure the wrap with zip ties, ensuring that no gaps remain at connection points.
For metal inlet/outlet ports, apply a thin strip of weather‑stripping tape around the joint before tightening the fittings. This creates a seal that prevents rattling while also reducing heat exchange, preserving the chiller’s efficiency.
The Poafamx Ice Bath Chiller includes upgraded insulated hoses designed to minimize heat loss. Its built‑in filter and pump (price $370.49, rating 4.1/5) make it a solid candidate for users who prefer a single‑unit solution with pre‑installed acoustic benefits.
Step 5: Optimize Placement and Ambient Environment
Location influences perceived noise. Place the chiller on a solid, level surface away from high‑traffic areas. If possible, locate it near a wall with acoustic panels to absorb stray sound. A distance of at least three feet from the plunge tub reduces the transmission of water‑flow noise directly to the user.
Consider adding a small rug or carpet under the unit if it rests on a hard floor. The rug acts as a secondary vibration damper while also protecting the floor from moisture.
For users who have limited space, the compact footprint of the AQOVOR Cold Plunge Chiller (price $299.99, rating 3.5/5) allows placement on a shelf with a soft backing, effectively isolating the unit from floor vibrations.
Step 6: Perform Regular Maintenance to Prevent Noise Build‑Up
Even the quietest chiller can become noisy over time if maintenance is neglected. Follow a monthly schedule to:
- Rinse the metal filter mesh and remove hair or debris.
- Inspect the pump impeller for wear and replace if necessary.
- Check all hose connections for tightness; re‑seal with silicone if leaks are observed.
- Clean the condenser coils with a soft brush to maintain efficient heat exchange.
Regular upkeep preserves the low‑noise performance and extends the lifespan of the unit. All recommended chillers provide a one‑year warranty and responsive support, ensuring that replacement parts are readily available if a component fails.
Tips & Pro Tips
- Use a sound level meter app on a smartphone to quantify improvements after each modification.
- Combine multiple isolation methods (pads + acoustic foam) for the greatest reduction, especially in apartments with thin walls.
- Run the chiller without water for a brief test to isolate compressor noise from pump noise.
- Upgrade to a variable‑speed pump if your budget permits; lower speeds produce less noise while still circulating water effectively.
- Avoid over‑filling the tub as excess water increases the load on the pump, potentially raising noise levels.
Troubleshooting
| Problem | Possible Cause | Solution |
|---|---|---|
| Rattling sound when chiller cycles | Loose foot pads or unsecured hose fittings | Re‑tighten pads, add zip ties to hoses, and verify all connections. |
| High‑pitched whine during operation | Air trapped in pump or clogged filter | Bleed air from pump, clean or replace filter mesh. |
| Intermittent loud bursts | Compressor over‑working due to insufficient insulation | Wrap condenser with reflective insulation and ensure ambient temperature is within operating range. |
Conclusion
Quieting a cold plunge chiller involves systematic identification of noise sources, strategic vibration isolation, acoustic insulation of hoses, and diligent maintenance. By applying the steps outlined above and selecting a well‑designed chiller—such as the AS ColdPlunge Chiller or the FADHOLE Ice Bath Chiller—one can achieve a tranquil recovery environment without compromising cooling performance.
Implement the recommended modifications, monitor noise levels, and enjoy the therapeutic benefits of a cold plunge that is as quiet as it is effective.
Products Mentioned in This Guide
Frequently Asked Questions
What are the main sources of noise in a cold plunge chiller?
The compressor, water pump, and vibration transmitted to the floor or surrounding structures are the primary noise contributors.
How do rubber vibration isolation pads reduce chiller noise?
They absorb and isolate vibrations from the unit, preventing resonant sound from traveling through the floor and walls.
Are acoustic foam panels effective for quieting a chiller?
Yes, they absorb airborne high‑frequency noise from the compressor, lowering overall sound levels.
Can I DIY a quieter chiller without voiding the warranty?
Using non‑intrusive accessories such as anti‑vibration mats, weather‑stripping, and sealant typically does not affect the warranty.
What regular maintenance helps keep a cold plunge chiller quiet?
Clean the condenser coils, tighten loose bolts, and inspect pads or seals for wear each season.