Introduction
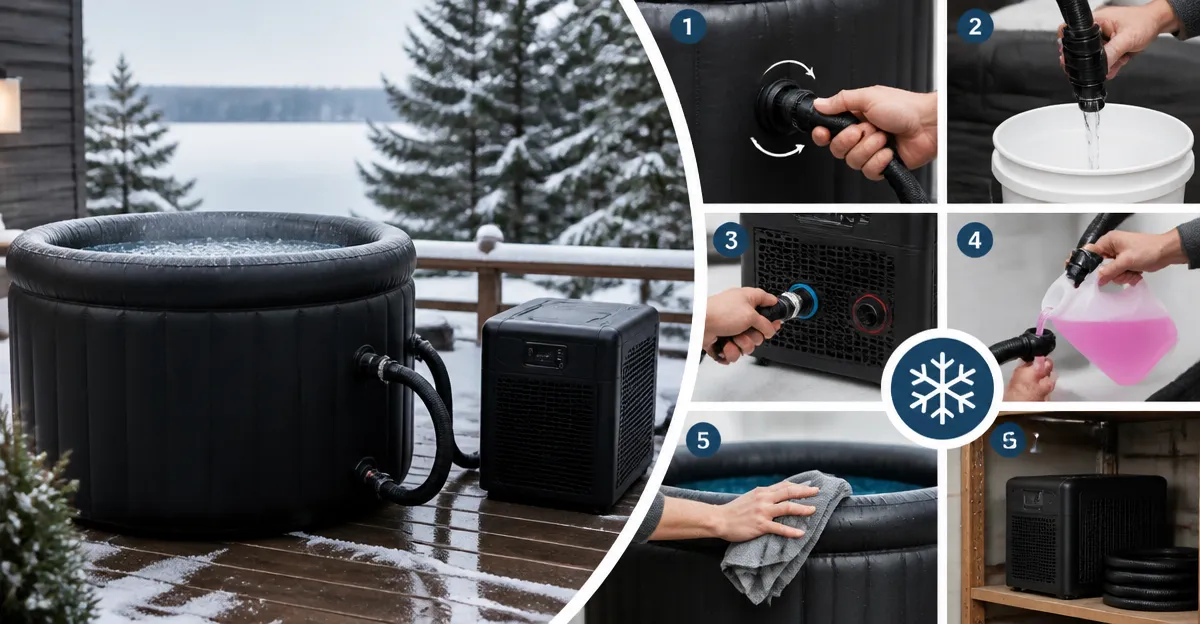
This guide explains how to winterize an inflatable ice bath that uses an inline chiller, preventing ice formation that can damage the tub, hoses, and pump. One will learn how to prepare the system before the first frost, maintain temperature stability during cold months, and store the equipment safely for spring. The process combines proper insulation, water management, and equipment selection, allowing athletes and wellness enthusiasts to enjoy reliable cold‑plunge therapy year‑round without costly repairs.
What You’ll Need
- Inflatable ice bath tub (e.g., AudaciaGo XXL Ice Bath Tub)
- Inline water chiller (e.g., AS ColdPlunge Chiller)
- Insulating lid or thermal blanket
- Thermometer or temperature probe
- Drain hose and submersible pump (often included with chillers)
- Water‑absorbent mat for slip‑free entry
- Basic tools: wrench, screwdriver, and zip‑ties
Step 1: Position and Prepare the Tub
Begin by placing the inflatable tub on a flat, level surface away from direct wind. The AudaciaGo XXL Ice Bath Tub offers a spacious 216‑gallon capacity (59.05 x 31.50 x 29.52 inches) and reinforced fiberglass walls, making it suitable for outdoor winter use. Inflate the tub using the included air pump; it reaches full size in under five minutes. Ensure the water‑absorbent mat is positioned inside the tub to prevent slipping when water is added.
Why this product matters: Its insulated lid and robust construction keep water cold for days, reducing the workload on the chiller. At $345.95 and a 4.5‑star rating from 117 reviews, it provides professional‑grade durability at a reasonable price.
Step 2: Connect the Inline Chiller
Next, attach the AS ColdPlunge Chiller. Verify that the tub’s inlet and outlet ports are 1/2 inch, matching the chiller’s connections. Use the insulated hoses and quick‑connect fittings supplied with the chiller to create a sealed loop. Tighten all fittings with a wrench to avoid leaks.
The chiller’s 1/3 HP compressor can lower water temperature to 42 °F, and its built‑in pump circulates water continuously, preventing stagnant zones where ice could form. The LED touchscreen allows precise temperature setting, and the metal mesh filter captures debris, reducing maintenance. Priced at $399.00 with a 4.3‑star rating from 180 reviews, it offers a quiet, efficient solution for winter operation.
Step 3: Insulate the System
Insulation is critical once temperatures drop below freezing. Wrap the hoses with foam pipe insulation and secure with zip‑ties. Place the insulated lid firmly over the tub; the AudaciaGo model includes four robust clamps that seal the lid, keeping cold air out and heat loss minimal.
If additional insulation is desired, a reflective thermal blanket can be draped over the lid and sides of the tub. This extra layer slows heat exchange, allowing the chiller to maintain the target temperature without excessive cycling, which conserves energy and prolongs component life.
Step 4: Fill, Test Temperature, and Set Controls
Fill the tub with cold water, adding ice if a rapid temperature drop is needed. For a winterized setup, aim for a starting temperature of 45 °F. Insert a waterproof thermometer through the lid opening to monitor water temperature accurately.
Activate the chiller and use the touchscreen to set the desired temperature (typically 40‑50 °F for recovery). The chiller will automatically adjust flow rate to maintain this range. Observe the system for at least 30 minutes to confirm stable temperature and verify that no frost forms on the hose connections.
Step 5: Implement Freeze‑Protection Measures
Even with insulation, extreme cold can cause water to freeze inside the tub or hoses. To mitigate this risk, add a small amount of antifreeze‑free glycol solution (food‑grade) to the water; this lowers the freezing point without affecting skin safety.
Additionally, schedule the chiller to run intermittently during the night when ambient temperatures are lowest. Many chillers allow a timer function; if not, a simple plug‑in timer can be used. Running the chiller for 10‑15 minutes each hour prevents ice buildup while conserving electricity.
Step 6: Prepare for Long‑Term Storage (Optional)
If you anticipate a period of non‑use, such as a prolonged freeze, it is prudent to drain the tub completely. Use the built‑in drain valve and hose (included with most tubs) to remove water. After draining, wipe the interior dry with a soft cloth to prevent residual moisture from freezing inside the liner.
Deflate the tub, fold it flat, and store it in a climate‑controlled space. The AudaciaGo tub folds into a compact carry bag, making storage straightforward. Keep the chiller in a dry area and cover it with a breathable cloth to protect against dust.
Tips & Pro Tips
- Monitor water chemistry. Add a mild, non‑corrosive sanitizer to inhibit algae growth during extended winter use.
- Check hose connections weekly. Cold temperatures can cause fittings to contract; re‑tighten if you notice any leaks.
- Use a spare insulated lid. If the primary lid is damaged, a backup prevents heat loss and debris entry.
- Consider a secondary tub. For households with multiple users, the Bubplay XL Ice Bath Tub (105 gallons, $63.99, 4.2‑star rating) offers a budget‑friendly alternative for secondary locations.
- Leverage the Ice Pod Pro. The Ice Pod Pro provides double‑layer insulation and a reinforced thermal lid, which can be used in conjunction with the chiller for enhanced freeze protection.
- For extra legroom. The Long Pod (126 gallons, $178.99, 4.1‑star rating) is ideal for taller users who require additional stretch while still benefiting from the same chiller setup.
Troubleshooting
| Problem | Possible Cause | Solution |
|---|---|---|
| Water temperature rises above set point | Insufficient insulation or chiller overload | Add extra thermal blanket, check hose insulation, and verify chiller filter is clean. |
| Ice forms on hose connections | Cold air infiltration | Wrap hoses with foam insulation and seal connections with waterproof tape. |
| Leak detected at inlet/outlet | Loose fittings | Turn off power, tighten fittings with a wrench, and re‑test for leaks. |
Conclusion
By following these six steps, one can winterize an inflatable ice bath with an inline chiller, preventing freezing damage and ensuring consistent recovery temperatures throughout the cold season. Proper placement, secure connections, comprehensive insulation, and proactive temperature management are the cornerstones of a reliable winter setup. With the recommended products, the process becomes efficient, cost‑effective, and durable, allowing athletes and wellness users to reap the benefits of cold‑water therapy year‑round.
Products Mentioned in This Guide
Frequently Asked Questions
How do I prepare my inflatable ice bath for winter?
Clean the tub, drain excess water, and set up an insulating lid or thermal blanket before the first frost.
What insulation methods prevent freezing damage?
Cover the tub with a thermal blanket, add a foam pad under the chiller, and seal any gaps with zip‑ties or tape.
How should I manage water levels and drainage during cold months?
Keep the water just above the pump inlet, use a submersible pump and drain hose to remove any standing water that could freeze.
Can I keep the inline chiller running in winter, and how to protect it?
Yes, run the chiller at a low setting and wrap its housing in insulated material to prevent the motor from freezing.
What is the best way to store the tub and equipment for spring?
Deflate the tub, dry it thoroughly, roll it up, and store the chiller and accessories in a dry indoor space away from extreme temperatures.