Introduction
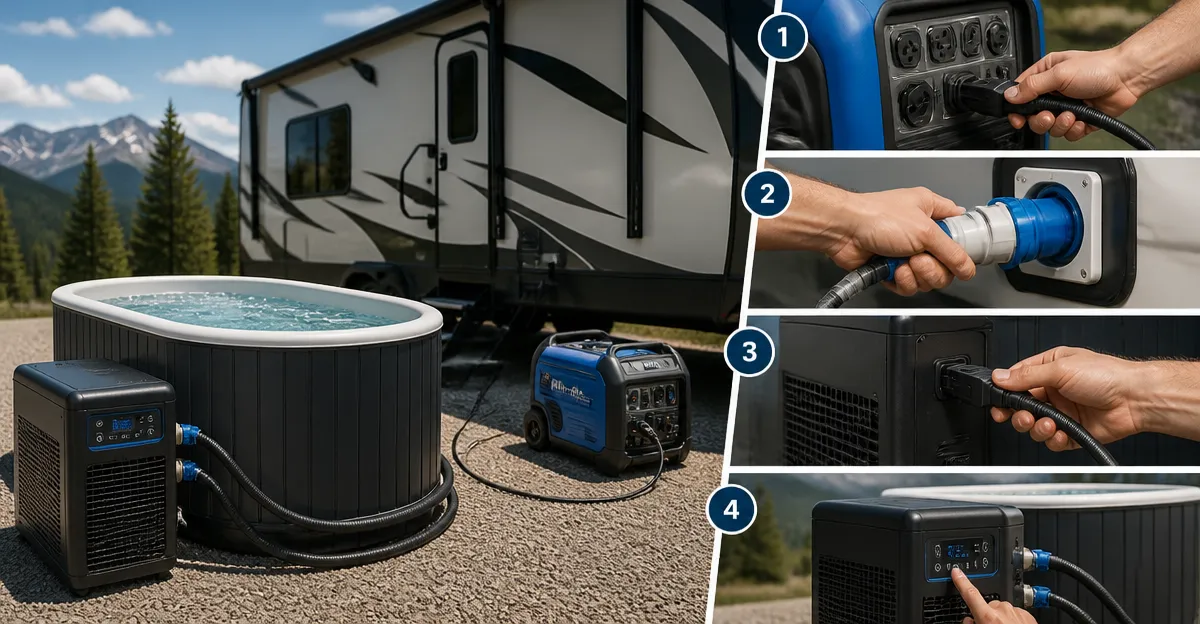
This guide explains how one can operate a cold plunge chiller using the power generated by an RV while traveling or camping. It details the necessary equipment, wiring methods, power budgeting, and safety precautions that ensure reliable cooling without draining the vehicle battery. Readers will learn how to select the appropriate chiller, connect it to a 12 V or 120 V source, and maintain optimal performance in a mobile environment. The information is valuable for athletes, wellness enthusiasts, and anyone seeking portable recovery solutions.
What You'll Need
- Portable cold plunge chiller (e.g., AS ColdPlunge 1/3 HP Chiller)
- RV generator capable of delivering 120 V AC and sufficient wattage (minimum 500 W continuous)
- Power inverter (if using 12 V DC to power a 120 V chiller)
- Heavy‑duty extension cords and waterproof connectors
- Temperature monitoring device or the chiller’s built‑in touchscreen
- Optional: EUHOMY 19QT Car Refrigerator for storing ice or pre‑chilled water
- Safety gear: GFCI outlet, surge protector, and fire‑rated cable clamps
Step 1: Prepare the RV Power Source
Begin by confirming that the RV generator is rated for at least 500 W continuous output, which comfortably exceeds the 280 W draw of the Pod Company 1/3 HP Chiller and the 180 W typical draw of the Active Aqua 0.10 HP Water Chiller. Verify that the generator’s outlet includes a grounded 120 V receptacle and that the fuel level is sufficient for the anticipated run time. Connect a heavy‑duty, outdoor‑rated extension cord from the generator to a portable GFCI outlet placed near the plunge tub to protect against ground faults. Finally, engage the generator’s low‑oil shutdown feature to prevent engine damage during extended operation.
Step 2: Position the Chiller and Tub
Place the cold plunge tub on a level, non‑slippery surface, allowing at least 12 inches of clearance on all sides for airflow. Position the chiller as close as possible to the tub while maintaining a dry environment; this reduces hose length and minimizes heat gain. If using the AS ColdPlunge 1/3 HP Chiller, connect the included insulated hoses to the tub’s inlet and outlet ports, ensuring a tight seal with the supplied waterproof tape. For models lacking a built‑in pump, such as the Active Aqua 0.10 HP Water Chiller, install an external submersible pump according to the manufacturer’s instructions.
Step 3: Connect Power Safely
When the chiller operates on 120 V AC, plug it directly into the GFCI outlet using a short, high‑quality cord. If the chiller supports 12 V DC input, such as the EUHOMY 19QT Car Refrigerator, you may use a 12 V to 120 V inverter rated for at least 600 W to avoid overloading the RV’s electrical system. Set the inverter’s output to “pure sine wave” to protect sensitive electronics within the chiller’s compressor. Before powering on, double‑check that all connections are tight, that the inverter’s ventilation is unobstructed, and that the generator’s fuel shut‑off valve is open.
Step 4: Configure Temperature Settings
Power on the chiller and allow it to run for five minutes while the internal sensors calibrate. Use the chiller’s digital control panel or companion smartphone app to set the target temperature between 42 °F and 58 °F, depending on personal comfort and recovery goals. The AS ColdPlunge 1/3 HP Chiller offers a touch‑screen interface that displays real‑time water temperature and alerts if the set point is not reached within a reasonable period. For models without a display, such as the Pod Chiller 2.0, monitor the temperature with a waterproof floating thermometer placed near the inlet.
Step 5: Monitor and Maintain
During operation, periodically inspect the hose connections for leaks and ensure that the chiller’s fan continues to run at a low decibel level (typically 42 dB for the EUHOMY 19QT Car Refrigerator). Clean the built‑in filter weekly to prevent debris buildup that could impair water flow; the AS ColdPlunge 1/3 HP Chiller includes a reusable metal mesh filter that rinses easily with a garden hose. Record power consumption using a plug‑in wattmeter to verify that the generator is not being overloaded, especially when additional RV appliances are in use. Finally, shut down the chiller at least one hour before turning off the generator to allow the compressor to equalize pressure and prevent premature wear.
Tips & Pro Tips
- Use the chiller’s “Eco” or “Boost” mode wisely; Eco conserves generator fuel while Boost quickly reaches the desired temperature for spontaneous plunges.
- Store pre‑chilled water in the EUHOMY 19QT Car Refrigerator to reduce the chiller’s workload on hot days.
- Place the generator upwind of the tub to prevent exhaust fumes from entering the plunge area.
- Install a surge protector between the generator and the chiller to guard against voltage spikes caused by sudden load changes.
Troubleshooting
Problem: Chiller does not reach set temperature.
Solution: Verify that the inlet water temperature is below 70 °F, increase fan speed if available, and ensure the filter is clean. For the Active Aqua 0.10 HP Water Chiller, confirm that the pump’s flow rate matches the recommended GPM for the reservoir size.
Problem: Excessive noise or vibration.
Solution: Secure the chiller on a vibration‑absorbing mat and check that the unit is level; the anti‑shock design of the EUHOMY 19QT Car Refrigerator demonstrates effective noise reduction for mobile applications.
Conclusion
By following these steps, one can reliably run a cold plunge chiller from an RV generator, achieving therapeutic temperatures wherever travel takes one. The guide emphasizes proper power budgeting, secure connections, and routine maintenance to extend equipment lifespan. Readers are encouraged to experiment with temperature settings and to integrate the optional refrigerator for enhanced convenience. With the right setup, cold‑water recovery becomes an accessible part of any mobile lifestyle.
Products Mentioned in This Guide
Frequently Asked Questions
What minimum generator wattage is required to run a portable cold plunge chiller in an RV?
A generator that can deliver at least 500 W continuous power is recommended for most 1/3 HP chillers.
Can a 12 V RV battery directly power a 120 V cold plunge chiller?
No; you need a power inverter to convert 12 V DC to 120 V AC before connecting the chiller.
How much electricity does a typical portable cold plunge chiller use?
Most units draw between 350 W and 450 W during operation, depending on ambient temperature and set point.
What safety steps should I follow when wiring a chiller to an RV generator?
Use heavy‑duty, waterproof connectors, keep cords away from heat sources, and install a circuit breaker or fuse to prevent overloads.