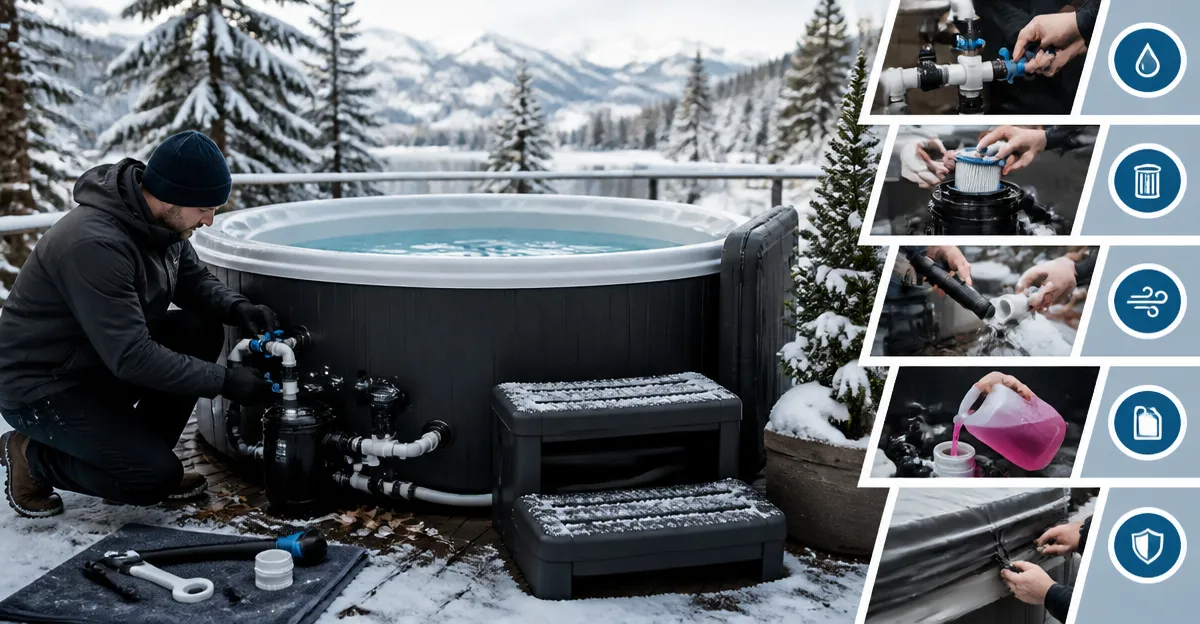
How to Winterize an Outdoor Cold Plunge: Step‑by‑Step Guide to Prevent Freezing and Protect Pump & Plumbing
Introduction
One often overlooks the seasonal maintenance required for an outdoor cold plunge, yet failure to protect the system can result in costly damage. This guide will teach the reader how to prepare an inflatable or rigid cold plunge for winter, ensuring that the tub, pump, and plumbing remain functional when temperatures drop below freezing. The steps outlined are based on best practices used by professional athletes and biohackers who rely on consistent cold‑therapy performance. By following these instructions, one can avoid frozen pipes, cracked lids, and premature equipment wear.
The value of proper winterization extends beyond equipment longevity; it also preserves water quality and reduces the need for extensive spring cleaning. When the plunge is ready for use at the first sign of milder weather, the user can resume recovery sessions without delay. The guide integrates real‑world product examples, allowing the reader to select tools that match their budget and performance expectations. Although the recommendations are optional, they illustrate how specific features simplify each task.
What You’ll Need
- Drainage hose or submersible pump (e.g., the pump included with 1stplunge Ice Bath Chiller Kit)
- Non‑abrasive cleaning brush and biodegradable sanitizer
- Insulating blankets or thermal covers
- Silicone pipe sealant and hose clamps
- Propylene glycol antifreeze (food‑grade) or a commercial winterizing fluid
- Water‑proof tarp or storage bag
- Adjustable wrench and hose connectors compatible with your tub
Step 1 – Completely Drain the Tub
The first priority is to remove all water from the plunge to prevent expansion and freezing inside the walls. One should attach a drainage hose to the built‑in drain port and direct it to a suitable drainage area, ensuring that the hose is free of kinks. If the tub lacks a dedicated pump, the submersible pump supplied with the 1stplunge Ice Bath Chiller Kit can be used to accelerate removal; this pump delivers sufficient flow for a 148‑gallon tub and operates quietly at approximately 40 dB. Draining should continue until the water level is below the lowest inlet, and a final tilt of the tub can help release residual water that may be trapped in seams.
Why this product? The included pump is designed for cold‑water circulation, meaning it can handle the low temperatures encountered during winterization without stalling. Its 1/3 HP motor provides enough power to move large volumes quickly, reducing the time spent on this labor‑intensive step. The kit is priced at $449.00, carries a rating of 4.2/5.0 from 59 reviews, and includes all necessary hoses and valves for a seamless setup.
Step 2 – Clean and Sanitize the Interior
After the water is removed, one should scrub the interior surfaces with a non‑abrasive brush and a solution of mild detergent followed by a biodegradable sanitizer. This eliminates biofilm, mineral deposits, and any residual chlorine that could degrade the tub material during freezing conditions. Rinse thoroughly with clean water, then allow the interior to air‑dry for at least two hours. For inflatable models such as the Ice Pod Pro, the UV‑resistant nylon fabric benefits from a gentle cleaning approach to preserve its protective coating.
The Ice Pod Pro, priced at $79.00 with a 4/5.0 rating from 150 reviews, features double‑layer insulation and a BPA‑free PVC liner that resists mold growth when properly maintained. Using a product with these specifications reduces the likelihood of cracks forming in the material when temperatures fluctuate.
Step 3 – Protect Plumbing and Pump Connections
All hoses, inlet and outlet ports, and the pump housing must be insulated to prevent water inside the lines from freezing. One should wrap each hose with a foam insulation sleeve and secure it with hose clamps. Apply a thin layer of silicone pipe sealant to threaded connections to create a watertight seal that will not become brittle in sub‑zero weather.
For users who own the JUGRFIT Cold Plunge Tub & Chiller, the built‑in filtration system and 1050 W chiller are already equipped with insulated ports, simplifying this step. The military‑grade drop‑stitch construction of the JUGRFIT tub provides structural rigidity, allowing the user to attach insulation without fear of damaging the fabric. Priced at $1,599.99 with a 4.8/5.0 rating from 78 reviews, this all‑in‑one kit includes a smart Wi‑Fi controller that can be set to a maintenance temperature of 45°F, further protecting the pump from freezing.
Step 4 – Add Antifreeze or Recirculate Warm Water
To ensure that any water remaining in the pump or lines does not freeze, one may either fill the system with a non‑toxic propylene glycol antifreeze solution or run a recirculation pump until the water reaches a temperature above 40°F. The antifreeze should be mixed according to the manufacturer’s instructions, typically at a 30 % concentration, which provides protection down to –20°F while remaining safe for occasional accidental contact.
If the user prefers a chemical‑free approach, the chiller component of the AudaciaGo XXL Ice Bath Tub can be set to maintain a low but above‑freezing temperature. This tub, priced at $328.65 with a 4.5/5.0 rating from 114 reviews, includes an inlet and outlet port that accept a standard 1/2‑inch hose, enabling the user to attach a small circulation pump that keeps water moving and prevents ice formation. The large 216‑gallon capacity also means the water mass retains heat longer, reducing the frequency of chiller activation during winter.
Step 5 – Cover and Store the Tub
Once the interior is dry and the plumbing is insulated, the tub should be covered with a thermal lid or a heavy‑duty waterproof tarp. The Ice Pod Pro’s insulated lid, for example, features a reinforced thermal cover that locks in residual warmth and shields the opening from snow accumulation. Secure the cover with straps or clamps to prevent wind from lifting it during storms.
For larger models such as the 1stplunge Ice Bath Chiller Kit, the kit includes an insulated lid and drainage system that can be folded and stored inside the accompanying backpack. Storing the tub in a sheltered area, such as a garage or covered patio, adds an extra layer of protection against extreme wind chill. If indoor storage is not possible, the user should elevate the tub on a pallet to keep the bottom off frozen ground.
Step 6 – Spring‑time Re‑activation Check
When temperatures rise above freezing, one should inspect all hoses for cracks, verify that sealant remains intact, and reconnect the pump to power. Fill the tub with fresh water, engage the chiller (if applicable), and monitor the temperature until it reaches the desired cold‑therapy range of 45‑55°F. Conduct a short 2‑minute plunge to confirm that water circulation is even and that no leaks appear at connections.
Because the JUGRFIT system includes a smart Wi‑Fi controller, the user can schedule a gradual warm‑up sequence, allowing the water to reach therapeutic temperature without manual adjustment. This feature exemplifies how integrated technology can streamline the re‑activation process after a winter storage period.
Tips & Pro Tips
- Inspect the tub for punctures before winter; a small leak can expand when water freezes, causing permanent damage.
- Use a digital thermometer to verify that the water temperature remains above 40°F throughout the coldest nights.
- Apply a thin coat of silicone spray to zip‑lock seams on inflatable tubs; this adds flexibility and reduces the chance of seam separation.
- Consider adding a small solar‑powered heater to the pump housing if the tub is stored in a location with prolonged sub‑zero nights.
- Document the serial numbers of pumps and chiller units; this aids warranty claims should a component fail after winter.
Troubleshooting
| Problem | Possible Cause | Solution |
|---|---|---|
| Water freezes inside hoses | Insulation insufficient or antifreeze not mixed | Wrap hoses with additional foam sleeves and verify antifreeze concentration. |
| Pump does not start | Power cord damaged or water level too low | Inspect cord for cuts, ensure tub is filled to the recommended minimum level. |
| Cover tears during winter | Heavy snow load or high winds | Secure cover with straps and consider a protective tarp underneath. |
Conclusion
One now possesses a comprehensive, step‑by‑step method to winterize an outdoor cold plunge, protecting both the tub and its associated pump and plumbing from freezing damage. By draining, cleaning, insulating, and optionally adding antifreeze or a recirculation system, the user can ensure that the equipment remains functional and ready for spring use. The product recommendations presented illustrate how specialized tools—such as the Ice Pod Pro or the JUGRFIT Cold Plunge Tub & Chiller—can simplify each stage while offering durability and performance. Implementing these practices will extend the lifespan of the cold plunge and maintain its therapeutic benefits year after year.
Products Mentioned in This Guide
Frequently Asked Questions
What are the first steps to prepare an outdoor cold plunge for winter?
Drain the water, clean the tub, and store the pump in a frost‑free area before covering the unit.
How can I protect the pump and plumbing from freezing temperatures?
Insulate all hoses and pipes with foam sleeves, and add antifreeze‑rated coolant to the pump reservoir.
Is it necessary to use a winter cover, and what type works best?
Yes, a tight‑fitting, UV‑resistant cover with an insulated liner prevents snow buildup and heat loss.
Can I leave water in the plunge over winter without damage?
Only if you add a non‑toxic antifreeze solution and keep the water circulating with a low‑speed pump.
What maintenance should I perform in spring after winterizing?
Remove the cover, flush the system, refill with fresh water, and inspect hoses and seals for cracks before restarting.